 61z6-HHM6iL._SL1500_.jpg
How to turn your regular bed into a smart bed
A cheap "are you in bed" sensor, built from a door and window sensor and a bunch of resistors? You bet!
The Home Assistant forum has an amazing thread on using door and window reed sensors for creative purposes.
I've decided to implement one of the projects mentioned in that thread; here is a detailed guide of how it went.
What you'll need
- A soldering iron and some rosin core solder.
- Home Assistant, properly running at home.
- A door and window sensor such as the Aqara door and window sensor.
- I've used it in other projects. It's very versatile.
- Depending on the sensor, you might also need a hub or coordinator to connect it to Home Assistant. In this case I'm using a ZigBee coordinator. Z-Wave, Bluetooth and Wi-Fi sensors may work just as well — you just need to make sure they can be added to your Home Assistant, and that they detect changes quickly.
- Three 10 kg thin film pressure sensors.
- I used these.
- The amount of pressure sensors you'll need varies depending on the size of your bed and the type of mattress you have. Mattresses that transfer a lot of weight to the sensor vertically probably won't need as many, but it's best to start with three.
- Of course, if your bed has two occupants, it's best to do this project twice — once per each side of the bed.
- Wires to hook it all up. Maybe a bit over two meters of wire?

|

|
How to build the hardware
The basic method of operation is fairly straightforward — the door sensor has a reed sensor inside it. When the reed sensor senses the presence of a magnet, which is the tiny little rectangle that ships with the sensor, it detects presence. The thin film resistors also "detect presence" when pressure is applied to them, and the door sensor — when properly wired, will also detect presence under those circumstances.
For this project, we assume your sensor has already been paired with Home Assistant, and you've already tested it works using the built-in magnet. We'll then go through three steps:
- Prep the door sensor.
- Wire up the thin film sensors.
- Place the contraption under your mattress.
Prep the door sensor
Here's what you're going to do with it.
First, you can discard the magnet that comes with it. Other than for testing your door sensor's operation, it's not going to be useful.
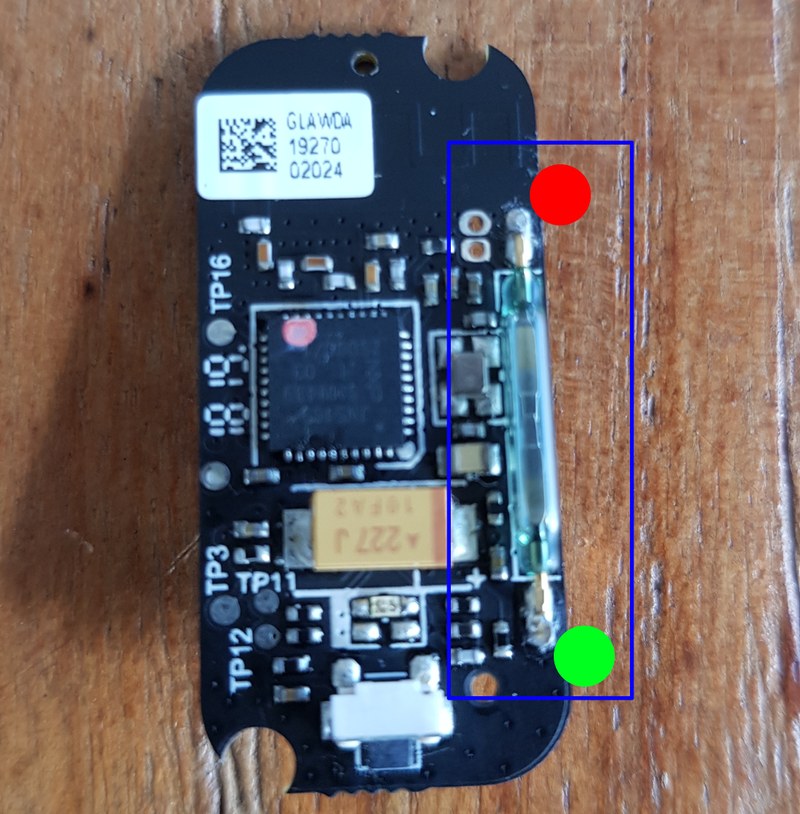
Using a spudger or other thin tool, open up the door sensor. Carefully disassemble the assembly and find the reed sensor, which should look (more or less) like this: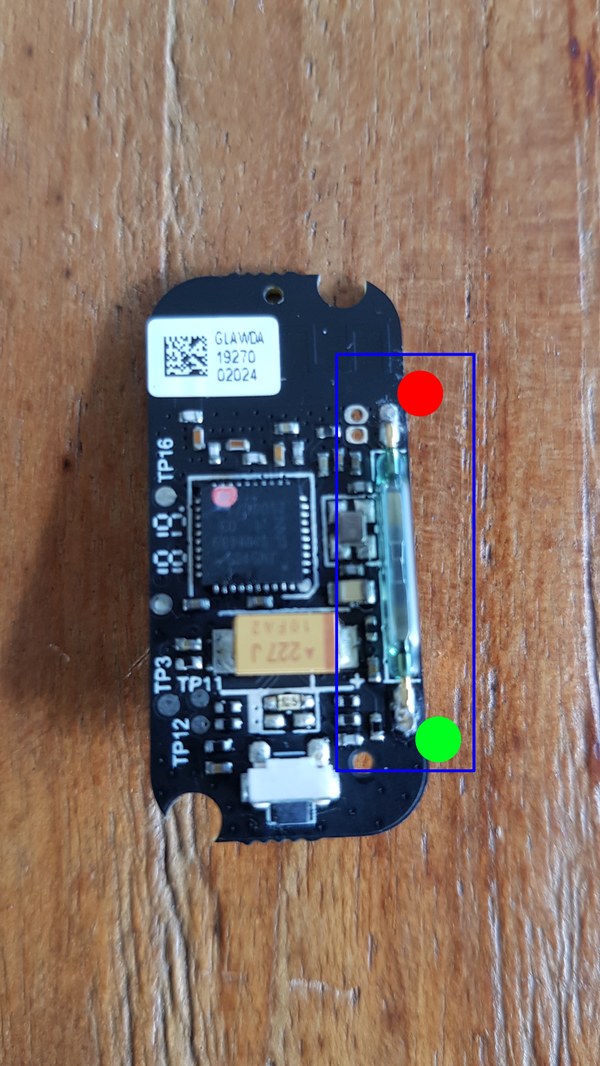
As you can see, the reed sensor looks like a tiny tube, soldered on both of its sides to the door sensor's board. I've taken the liberty of coloring red and green next to the solder joints.
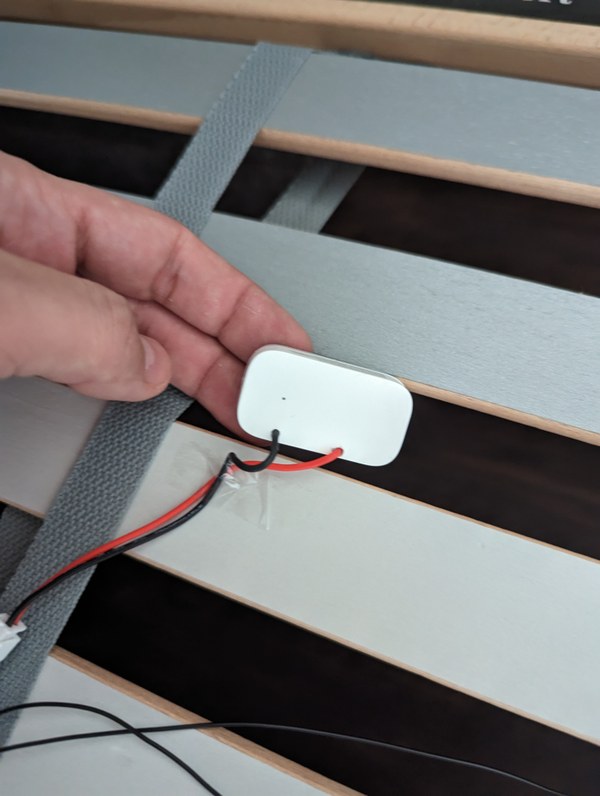
Take some of your wire and cut two pieces (later you'll see a photo of the completed project that will give you an idea of how long). Strip the ends of those two wires, and carefully solder each one of them to one of the solder joints. You can desolder the reed sensor first, but you don't have to; it's probably best to just keep it seated there.
Now map out where those two solder joints would map to the case of the door sensor, and drill two holes in the case for the wires you just soldered.
Run the two wires you just soldered through those holes, and put the sensor back together. Be careful to replace the battery back in the sensor, and to not break the posts that position the sensor circuit board inside its case.
The end result will look like this:
Wire up the thin film sensors
I'll first show you how the end result looks like:
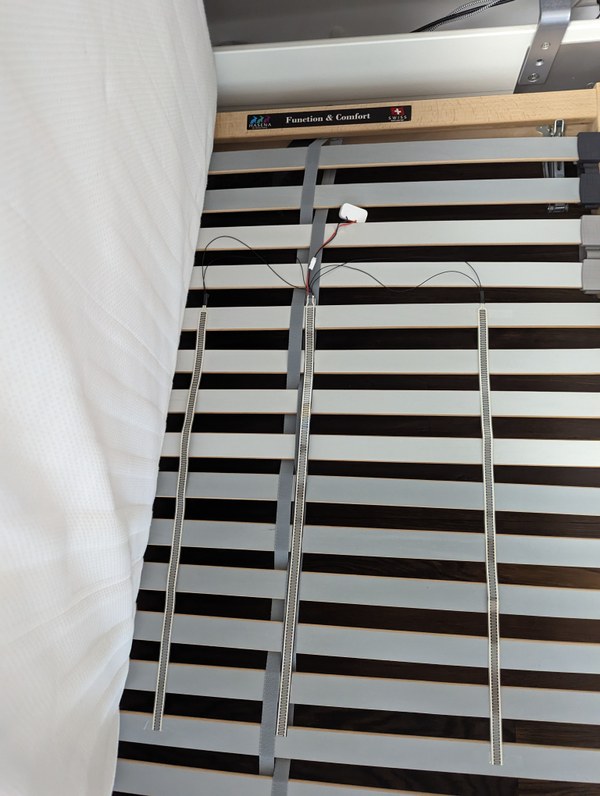
And here is the connection diagram:
With that explained visually, here's what you'll do:
- Take more wire — roughly four strips of 50 cm wire — and bridge each contact of the three pressure sensors with each other, using your soldering iron and some solder.
- One side of each pressure sensor should connect to the same side of the other two.
- The other side of each pressure sensor should bridge to the other side of the other two
- Now bridge one of the common sides of the pressure sensors to one of the cables sticking out of the door sensor, and the other side of the pressure sensor to the other cable sticking out.
- Make sure all solder joints are solid, then wrap them in masking or Kapton tape to prevent short circuits.
The goal here is to connect all three pressure sensors in parallel to the inputs of the door sensor.
Once you've done this, pinching any one of the three pressure sensors with your fingers should cause your door sensor to show as closed. Releasing the pressure should cause the door sensor to change to open.
Place the contraption under your bed
With the contraption soldered properly, and well-tested, place it under your bed. Here are the basic bullet points regarding placement:
- Figure out where you put the most pressure when you're lying in bed normally. It's usually an area roughly 70-80 cm wide and 1 m long.
- Place each one of the three pressure sensors equidistantly to cover that region well.
- Affix each pressure sensor on each end with simple Scotch tape, so they won't move.
- Also affix the door sensor with Scotch tape (perhaps under your bed slats?) so it won't move and the connections won't deteriorate over time.
- Make sure the film pressure sensors are affixed taut! They should be flat and they should also not be loose in any way.
Just for reference, here's a rough visual guide for the placement under the bed you want:

The test that will tell you you've placed the sensor correctly is fairly simple:
- Does the door sensor show closed in Home Assistant when you lie in bed?
- Does the sensor show open in Home Assistant shortly after you stand up?
This might involve some trial and error. That is fine. Keep at it until you get a reliable signal from your door sensor.
The software setup
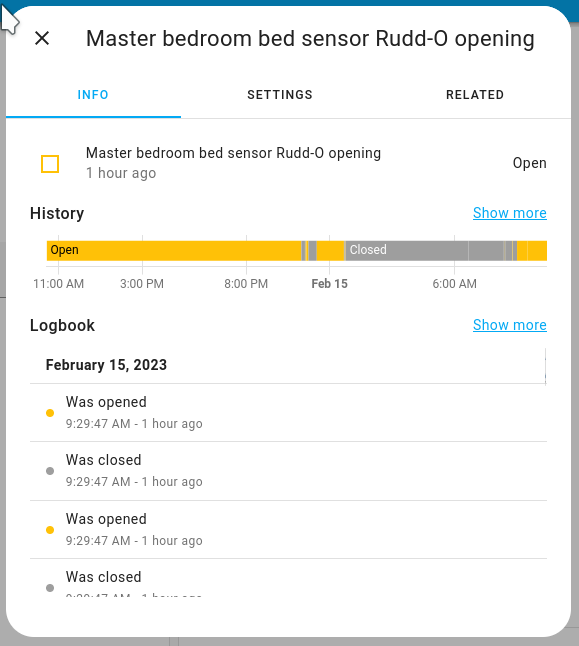
There's one more thing missing before you can use your automation, and that is debouncing the door and window sensor. These sensors are hair-trigger sensitive to pressure changes in bed, which may cause them to open and close repeatedly while you lie in bed. This needs to be accounted for.
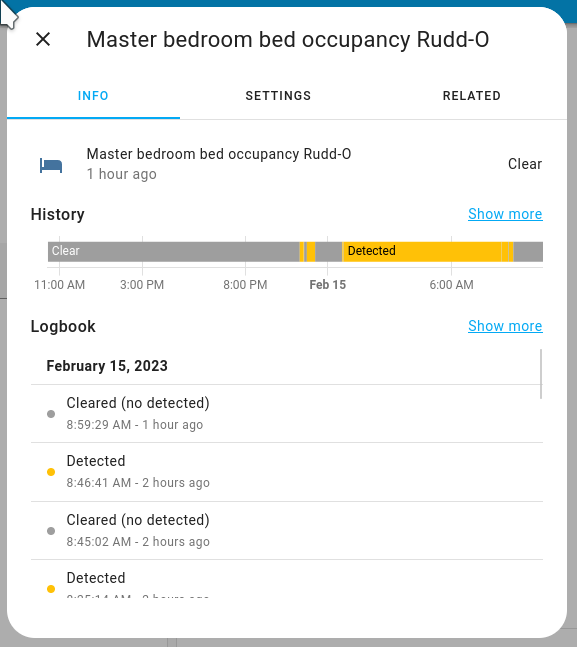
Additionally, the logic of the sensor must be inverted — because the bed is occupied when the door sensor shows closed, and vice versa.
To that effect, you will add the following to your Home Assistant's configuration.yaml file:
template:
  # You may already have other templates here.  If so, just
  # append the following block of configuration.
  - binary_sensor:
    - name: "Bed presence"
      # This represents the unique ID of your bed sensor.
      unique_id: binary_sensor.bed_presence
      # We assume the entity name of your door sensor is
      # binary_sensor.aqara_door_sensor_opening in this example.
      # Change to suit your circumstance.
      state: >-
        {{ not is_state('binary_sensor.aqara_door_sensor_opening', 'on') }}
      # Debouncing for 15 seconds.
      delay_on: "0:00:15"
      delay_off: "0:00:15"
      # This is an occupancy class sensor.
      device_class: occupancy
      # The sensor must not show as available when the reference sensor isn't.
      availability: >-
         {{ states('binary_sensor.aqara_door_sensor_opening') not in ['unavailable', 'unknown'] }}
      # This template changes the icon depending if you're in bed or not.
      # Note that the icon template refers to this sensor's unique ID,
      # rather than to the reference sensor's ID.  This is because we
      # want to change the icon when the value of this sensor changes,
      # not the un-debounced value of the reference sensor.
      icon: >-
        {% if is_state('binary_sensor.bed_presence', 'on') -%}
        mdi:bed
        {% else -%}
        mdi:bed-empty
        {% endif -%}
That's all. Once you have this in the file, restart Home Assistant.
If everything works correctly, you'll see the following results in the Overview screen of Home Assistant:

Your hardware and software are done. Congratulations?
So what is this stuff good for?
Good question! Once you have your bed occupancy sensor going, you can do amazing stuff with automations:
- Went to bed? Arm the home alarm, and alert you if the front door isn't closed. One hour after waking up, revert those actions.
- Turn off all home lights once you and your spouse are sound asleep.
- Make sure that your Sonos speaker system plays loud music when the alarm sounds in the morning; this one is particularly useful for deep sleepers!
As always, with Home Assistant, your dreams are the limit.


